record your work!
A Procreate Timelapse Is A Record Of Your Process And Work
You may not have known that it’s possible in Procreate to record a time-lapse video of you creating your masterpiece, but it is, and you should. Here’s why. For starters, it’s really cool to see the magic happen, and fun to share on social media. C’mon, you know you want to post your process to Insta!
But the real reason I recommend you do this is a little darker. If someone ever accuses your work of not being original, you will have a record of every brush stroke you ever made on that digital canvas. This may not matter to you if you just create art for fun, but if, like many of us, you would like to sell or license your work someday, it would be awfully nice to have a record of your work. And Procreate makes it easy! Here’s how:

How To Record A Timelapse Of Your Work In Procreate:
Click on the wrench icon in the upper left hand corner, right next to where it says “Gallery”
Click on “Video”
Toggle the “Time-lapse Recording” switch to on
As long as that time-lapse recording switch is on, you’re good to go - just make sure you do this right at the beginning, before you start creating. On a brand new canvas, the recording is on by default, at the “good” quality setting.
Pay Attention To The Video Quality Of A Procreate Recording
A couple of notes here. If you would like to share the video in any way, you may want to increase the quality level to 4K, Studio quality just so you have the best possible video to work with. You can always downgrade, but you can’t upgrade.
The other thing you may want to think about is if you use canvases you’ve purchased on Etsy, Creative Market, Design Cuts, or anything similar, the video recording is often turned off to make the file size smaller. Not a problem, just make sure you turn it on before you start working. Be aware that the quality of the video can’t be changed after the canvas is created.
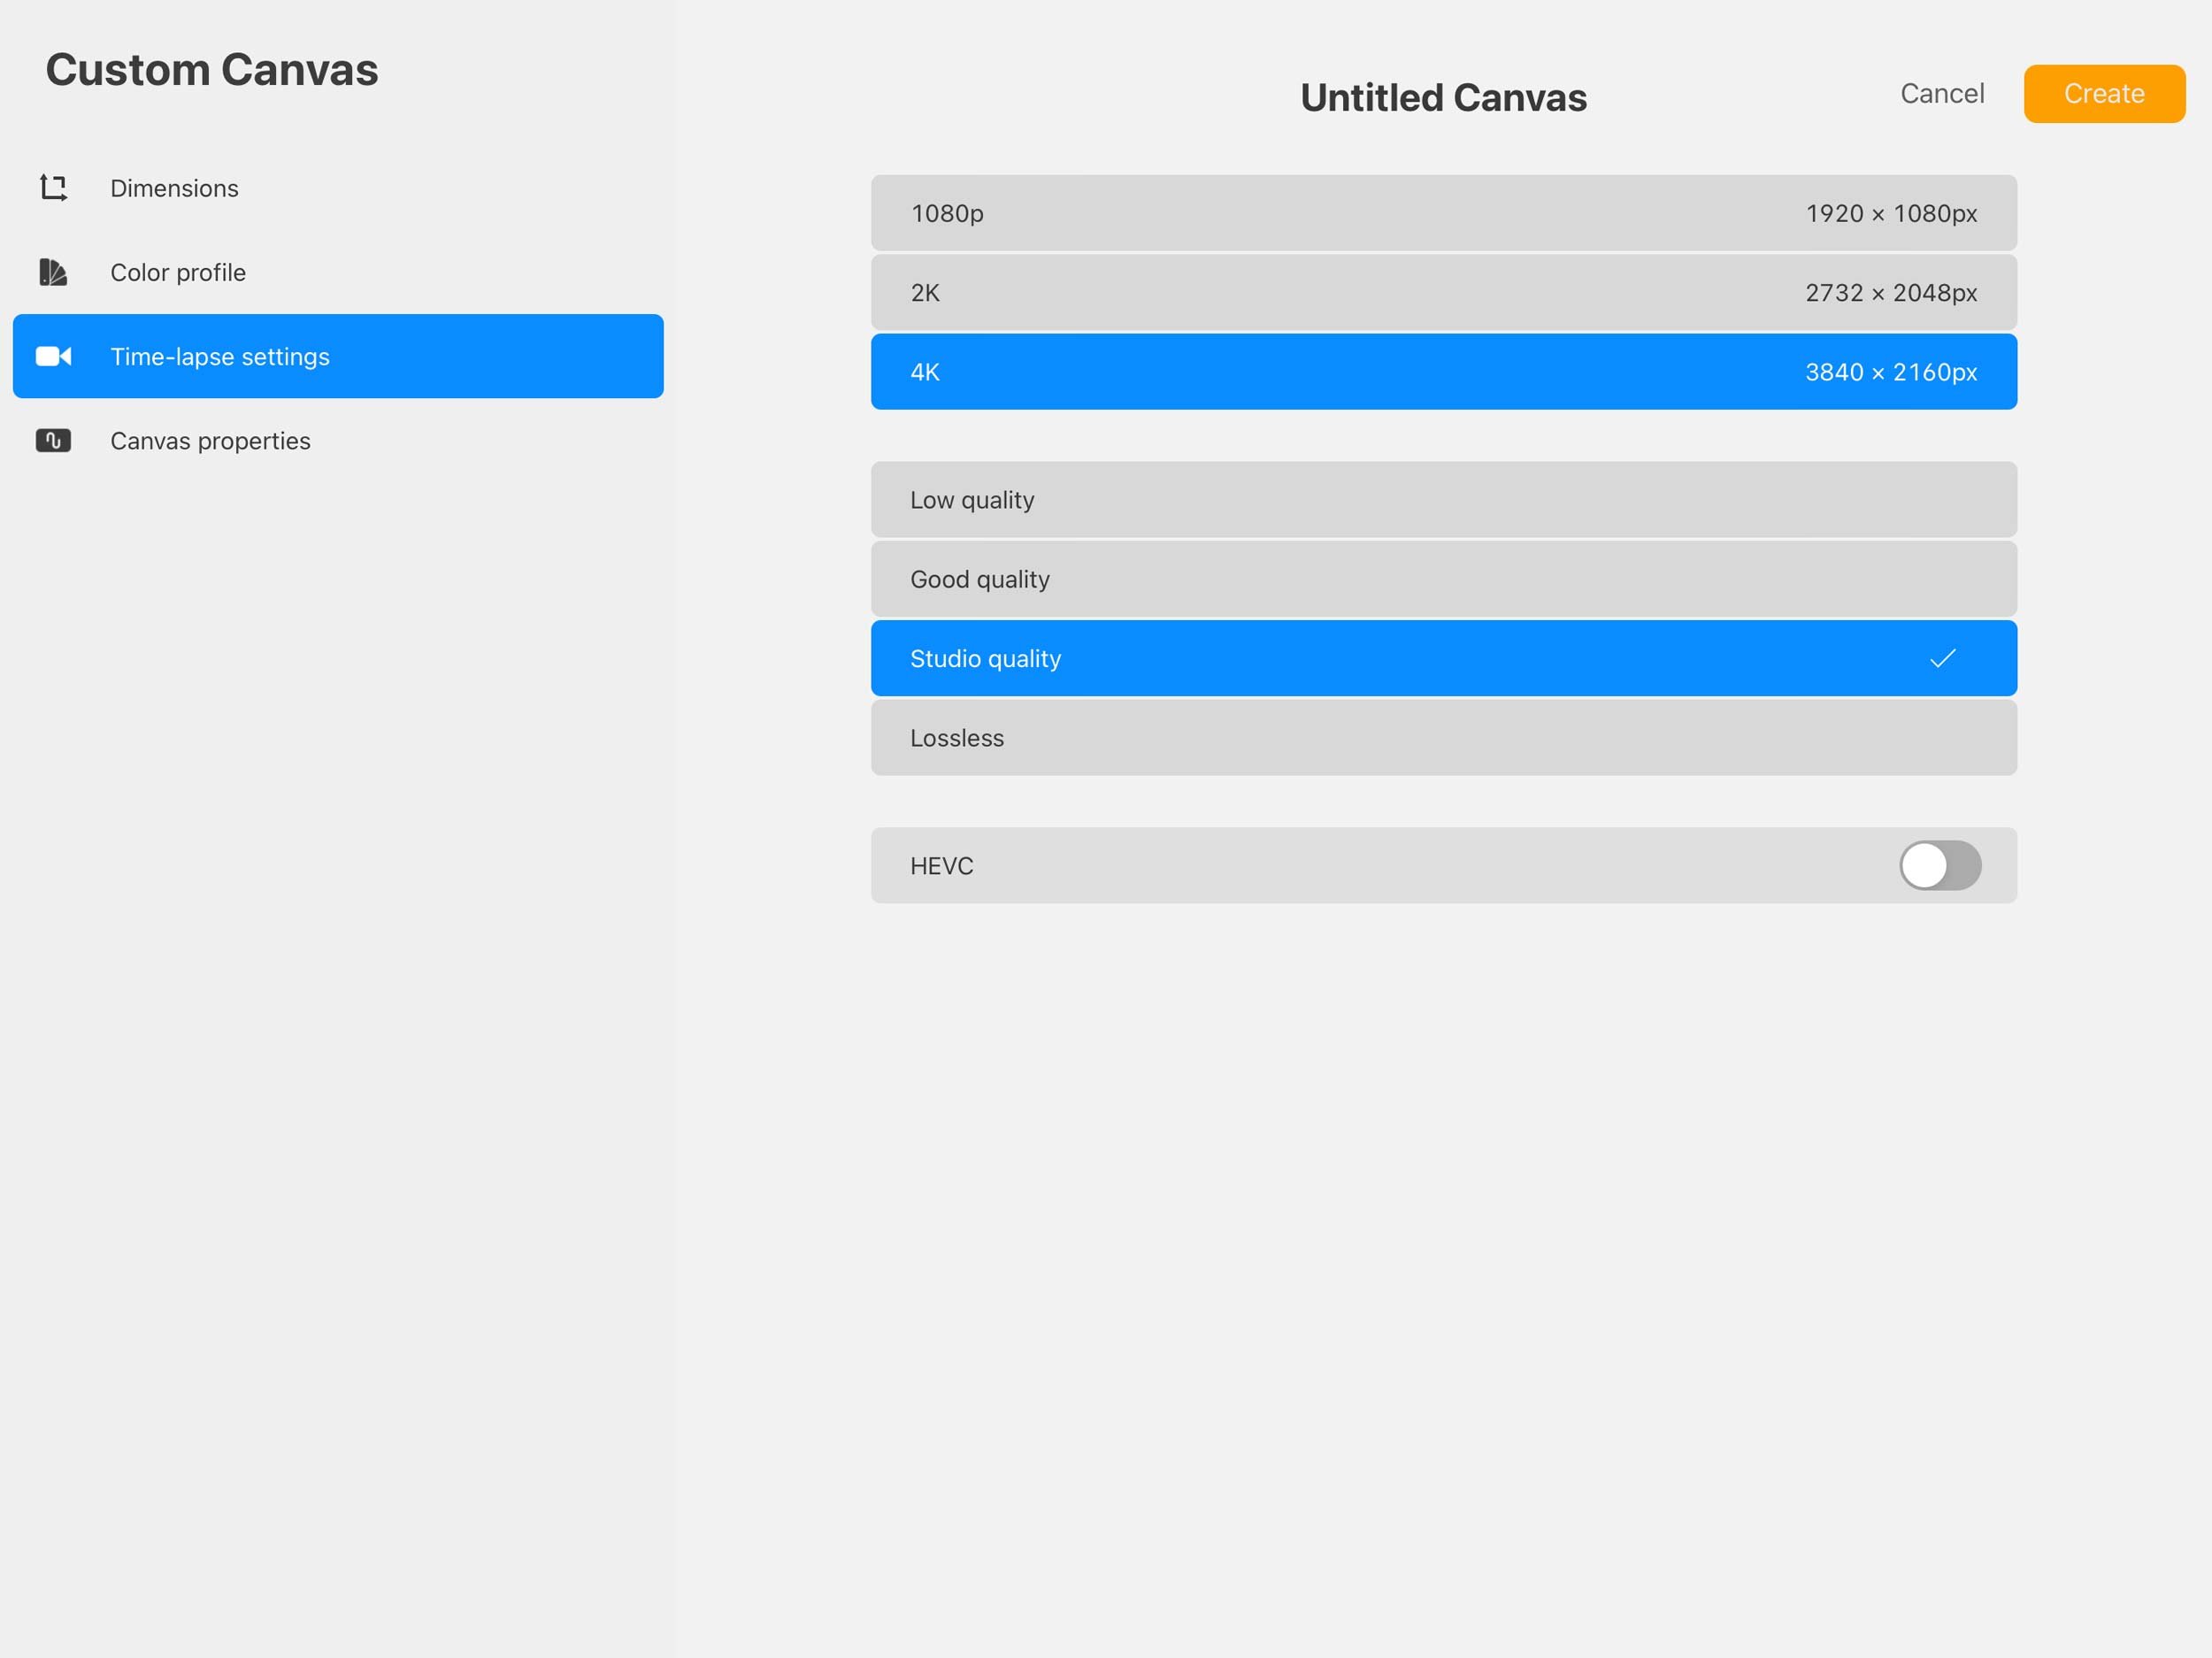
Procreate Video Setting Options
If you’re creating a custom canvas, the second image here shows the screen for setting up your time-lapse recording quality. The options range from 1080p to 4K, and from Low quality to Lossless. According to Procreate, HEVC is a new form of video compression for advanced motion graphics creation. It is off by default, but can be toggled on.
I personally choose the settings you see in the photo - 4k and Studio quality., and any of the time-lapse videos I’ve shared started with these settings. The higher quality will increase your file size a bit, but it’s worth it if you ever want to share the video. If you’re only using it for proof of your work, a lower quality will be just fine.
If you’re curious about these time-lapse videos, there’s quite a rabbit-hole out there on Instagram, TikTok, and YouTube. As I mentioned, I’ve even done a few myself! Search #procreatetimelapse and I promise you will lose hours of your life…
check these procreate tutorials, tips and tricks out, too!

the latest on the ‘gram…